 In January, I participated in firing a wood kiln at the Penland School of Crafts . Wood fired kilns are more time intensive but the results are unique. There are basically three ways you can heat up a kiln: electric powered, gas powered, or wood fire powered. Each has a different atmosphere. For example, wood kilns have lots of ash flying around from the burned wood that then falls on the pots in the kiln, then melts into a glaze from the heat and flame. The result is a patina unique to each ceramic piece. In comparison, electric kilns, which are the kilns that my studio has, have a much cleaner atmosphere and glazes come out more predictably. With electric kilns you have a lot more control because you are able to get kiln sitters which you use to program the firing and then it will run without having to watch it for the entire firing. A wood kiln requires constant feeding and tending for the duration of the firing, which can last anywhere between three to six days depending upon the size. The wood kiln at Penland was 400 cubic feet. Because a wood kiln requires constant tending people will sign up for shifts- for this last one I helped fire we worked eight-hour shifts.


At the beginning, feeding the fire (or the dragon) means a few sticks every ten minutes as it gradually builds with intensity until you are feeding multiple logs in the front and several sticks in holes on the sides. There are cones (pieces of clay shaped like long triangles that melt at different temperatures) placed throughout the kiln so that we can tell how hot it has gotten throughout the kiln. The front of the kiln, where the fire box is located (similar to fireplace), can be at cone 11 (2399 degrees Farenhieght) while the back has only reached cone 8 (2305 degrees Fahrenheit). Glazes are made to look a particular way (eg.: shiny, matte, translucent, or opaque) and they have to reach a certain temperature to do so. If they are fired too low they won’t look right; if fired too high they could melt right off.


Once the kiln is finished firing it takes between three and seven days to cool. Since the kiln was 400 cubic feet it required a day and a half to load and three days to cool. Once the kiln is unloaded it needs another day of cleaning the kiln, grinding the shelves and putting kiln wash on the shelves and kiln bricks. All added up, the firing took ten days from start to finish- most of the work quite physical.


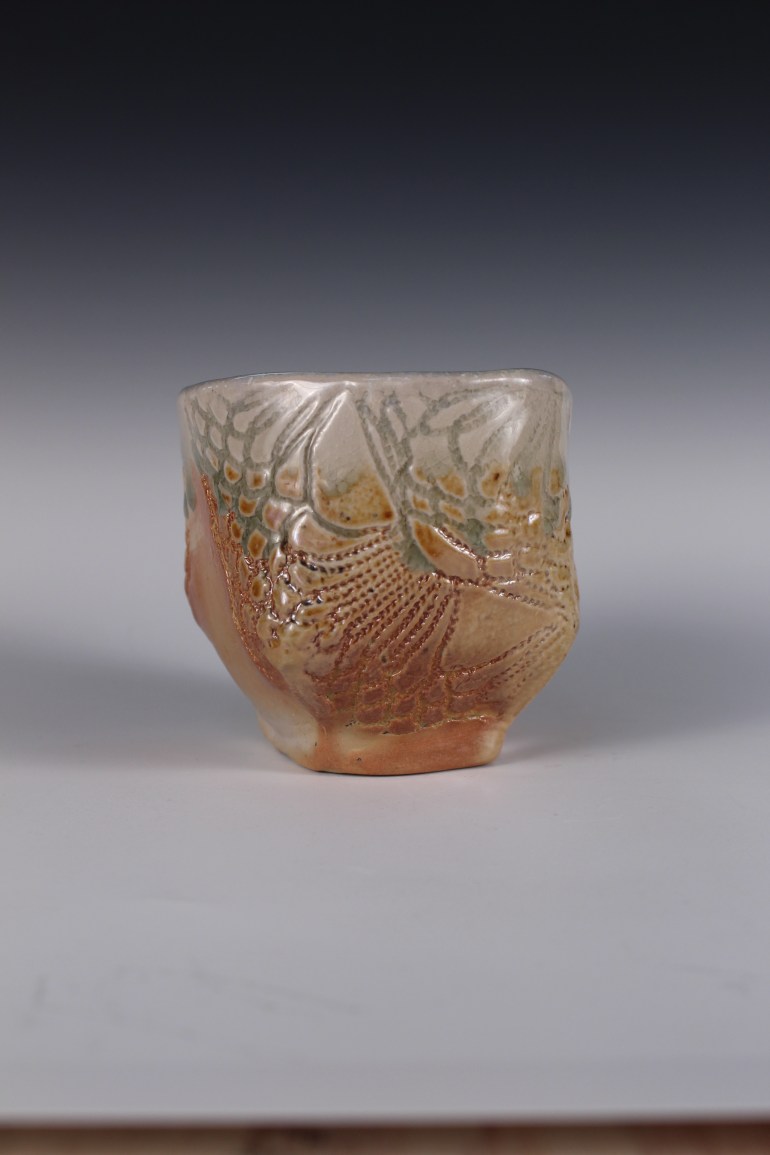
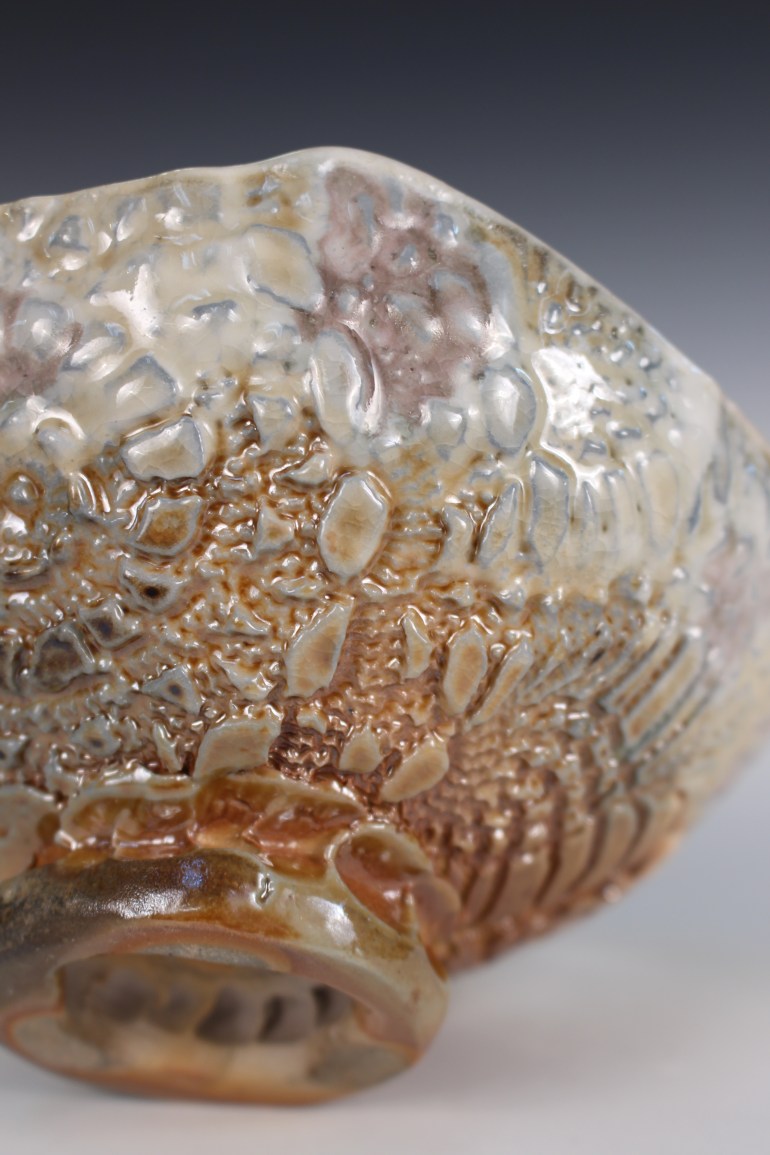
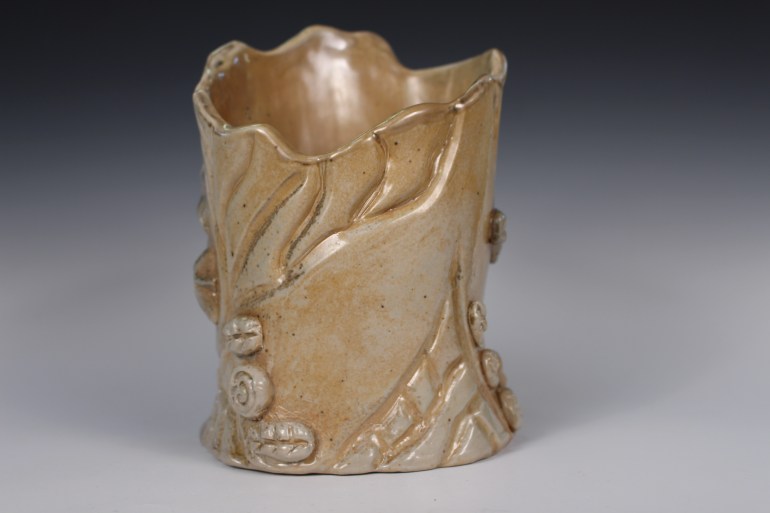
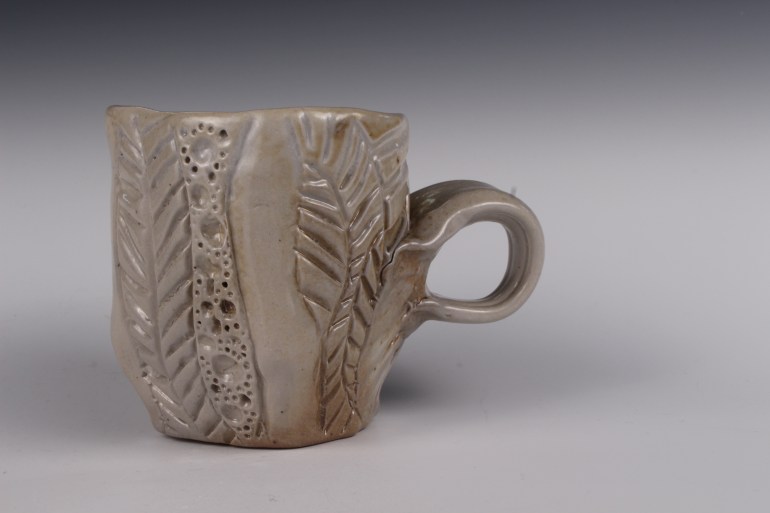
When a wood kiln is opened, it’s like Christmas morning! It’s been eight days since anyone has seen their work. Since there is less control than an electric kiln you don’t know whether you’re going to get a pair of socks or the pony you asked Santa to give you for Christmas. In this last kiln, some of my pots were “ponies;” none of them were “socks.”


I have been working my way through photographing the work that I got out of the Penland kiln. Photographing three dimensional work is precise and time consuming. Getting the lighting right so that the color is represented and reducing any glare from the lights. I recently got a digital SLR camera with the intention of using it for photographing my work. So I am still fiddling with it while I go through this new batch of work, which is slowing me down as well. I am about half way through since I have been working on it in between projects at the studio.